General
How to Calculate Markup for Construction Bids
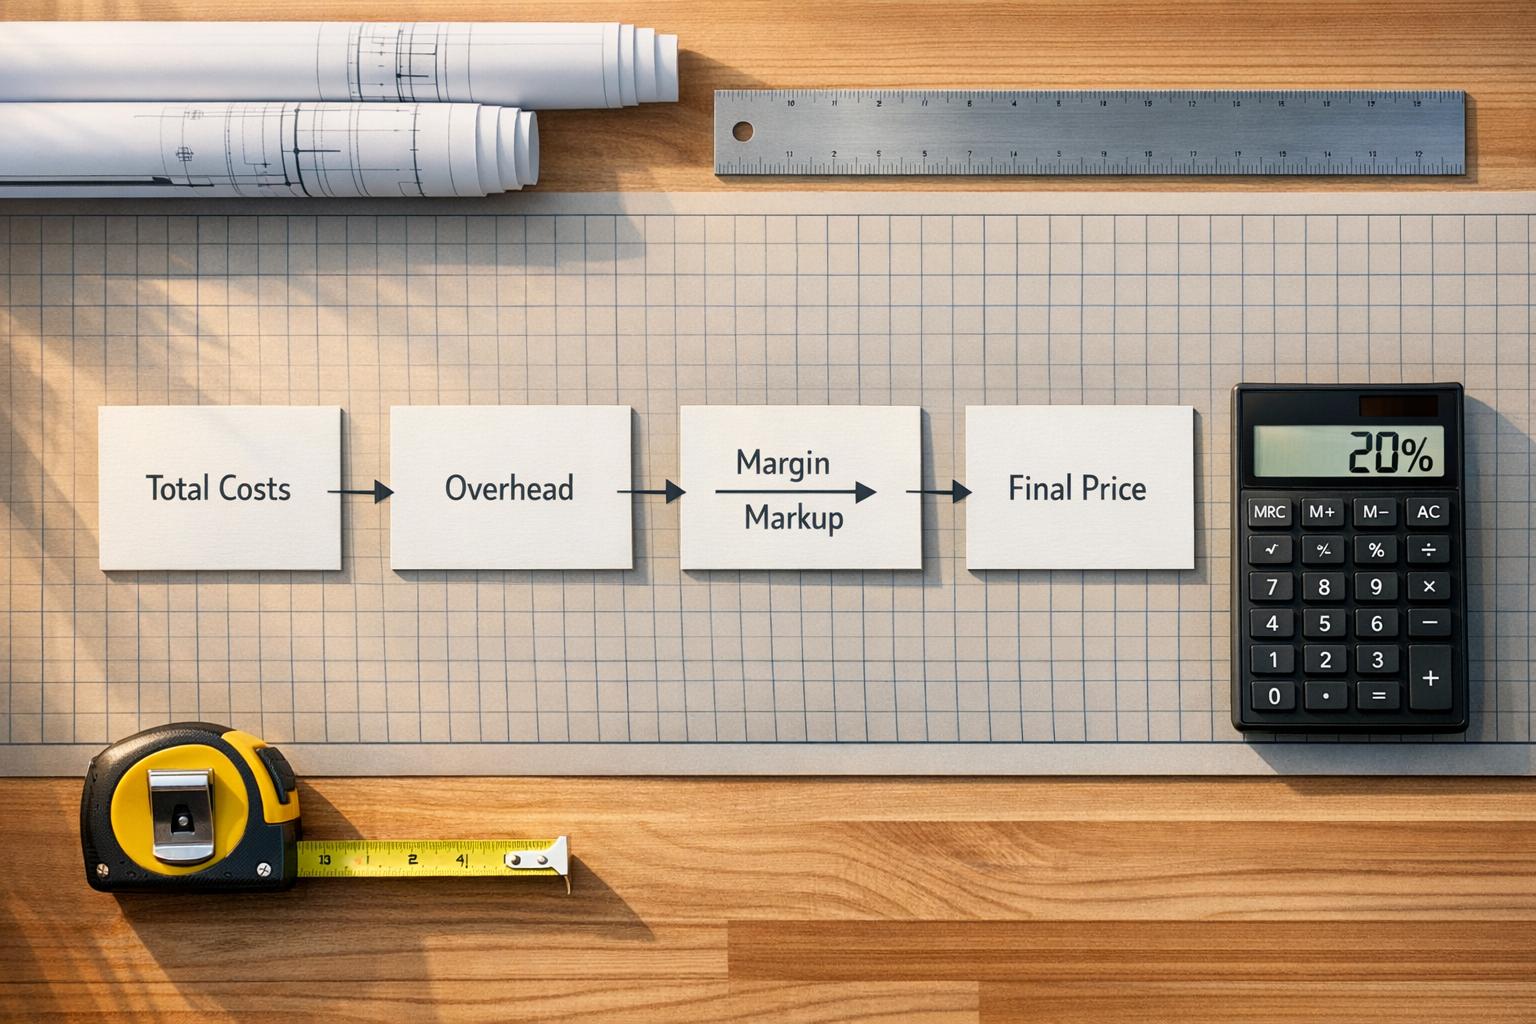
Markup is the percentage added to direct project expenses — labor, materials, equipment — to cover overhead and profit. Markup is not the same as margin: a 20% markup only delivers a 16.7% profit margin. To hit a 20% margin, you need a 25% markup. The formula is Markup % = Margin % / (1 − Margin %) and the cleanest way to price a bid is Selling Price = Total Cost / (1 − Margin %).
Calculating markup correctly is one of the most important things a subcontractor can get right. Underprice and you eat the loss on every job. Overprice and you don’t win the work. The line between profitable and broke is often a few percentage points of markup applied accurately.
This guide walks through the full process — direct costs, overhead, target margin, the formula itself, and how to adjust markup for project size, complexity, and risk.
How to Calculate Markup: Step-by-Step
Calculating markup might seem tricky, but breaking it down into steps makes it manageable. Here’s how to make sure your bid accounts for all costs and delivers the profit you want.
Calculate Total Direct Costs
Start by summing up all the expenses directly related to the project. This includes labor, materials, equipment, subcontractor bids, and project-specific costs like permits or temporary facilities. Use up-to-date pricing — material quotes can swing 10% to 20% between bid date and project kickoff.
- Labor costs: Use the fully burdened rate, which includes FICA (7.65%), workers’ compensation, health insurance, and paid time off.
- Material costs: Base on current supplier quotes. Factor in waste — 5–10% for pipe and wire, 10–15% for drywall and framing lumber, 15–20% for brick and tile.
- Equipment: Even if you own it, assign an internal rental rate. Include rental fees, fuel, and depreciation.
- Subcontractor bids: Get at least two quotes per trade and check for exclusions like startup testing or site cleanup.
- Project-specific costs: Temporary power, site trailers, security, mobilization. These can add 5–10% to total project cost, especially on smaller jobs.
Determine Your Overhead Costs
Once direct costs are nailed down, move to overhead — the expenses needed to run your business that aren’t tied to any single project. Overhead falls into two categories:
- G&A Overhead: Office rent, administrative salaries, insurance, software subscriptions. Typically 8–15% of direct costs, closer to 10–20% for commercial contractors. Don’t forget to include your own salary — skipping it means your “profit” is just unpaid labor.
- Project Overhead: Job-specific costs like permits, trailers, and project manager salaries. Allocate by dividing total annual overhead by your chosen base (total direct costs or labor dollars). Revisit quarterly to adjust for changes in business volume.
Set Your Target Profit Margin
Decide on a profit margin that aligns with your business goals and industry standards. Net profit margins typically vary by sector:
- General contracting: 3–6%
- Specialty trades (electrical, mechanical, etc.): 5–10%
- Design-build projects: 8–15%
Margin and markup are different. A 20% profit margin requires a 25% markup, because a 20% markup only gives you about a 16.7% margin.
Apply the Markup Formula
Calculate your selling price using one of these formulas:
Selling Price = Total Cost / (1 − Margin %)
Example: $80,000 total cost at 20% margin = $80,000 / 0.80 = $100,000
Selling Price = Total Cost × (1 + Markup %)
A two-step method also works: first apply your overhead recovery to direct costs, then add your target profit margin on top.
Verify Your Markup Covers Overhead and Profit
Before submitting, double-check that your markup fully accounts for overhead and delivers the profit you expect. Calculate your break-even point — direct costs plus allocated overhead, before profit — to know the minimum bid price that avoids a loss.
Do a sanity check by comparing cost per square foot or unit to historical data or industry benchmarks like RSMeans. If your bid seems much higher or lower than expected, revisit your calculations. For projects lasting over 90 days, consider adding a 3–5% material escalation clause to protect against price increases.
Adjusting Markup for Different Project Conditions
Your base markup formula is just the beginning. Every project is different, and factors like size, complexity, and risk can significantly impact your costs. A $30,000 bathroom remodel involves different challenges — and different overhead — than a $2 million commercial build-out. Tweaking your markup to fit the conditions keeps you competitive while protecting margins.
Adjusting for Job Size and Scope
Smaller projects often need higher markup percentages because fixed costs — estimating, contract management, insurance — don’t scale down with the project. A $40,000 kitchen remodel might require a 35–45% markup, while a $750,000 multi-unit renovation could work with 22–28%. With smaller jobs, fixed costs eat into each dollar more.
Complexity matters too. Custom home builds or multi-story additions with specialized materials often demand 35–45% markups, compared to 20–25% for simpler repairs. Commercial projects tend to have lower markups (15–20%) due to higher contract volumes. Residential work typically justifies higher markups — between 25% and 50% — because homeowners scrutinize every detail.
Factoring in Project Risks
Risk is a major factor when adjusting markup. Tight deadlines, difficult site conditions, or unfamiliar clients all increase the chances of cost overruns. For high-risk projects with aggressive schedules or complex requirements, aim for an 8–12% profit margin instead of the typical 5–8%.
Labor is harder to predict than material costs, so it deserves extra attention. A tiered markup approach can help: about 20% for standard materials like lumber, but up to 40% or more for custom, non-refundable items like architectural windows. Remodeling projects are especially tricky — hidden issues like rot or code violations add cost. A 10–15% contingency on top of base markup helps cover surprises. When working with subcontractors, adding a 15–20% premium to their bids accounts for scheduling issues and warranty management.
Using Market Rates to Set Competitive Markup
Market rates are another tool to fine-tune your markup. Knowing what competitors charge is useful, but copying their prices can backfire — your insurance, fuel, software, and payroll taxes are not the same as theirs. Use market rates as a benchmark, not a target.
The win-rate signal: A healthy win rate usually falls between 15% and 25%. If you’re winning more than one-third of your bids, you may be underpricing. If you’re winning less than 15%, your markup may be too high for your market. Check your win rate quarterly and adjust as needed.
If your backlog is thin and you need work, temporarily lowering your markup can keep crews busy without jeopardizing long-term profitability — but treat it as a deliberate, time-boxed move, not the new baseline.
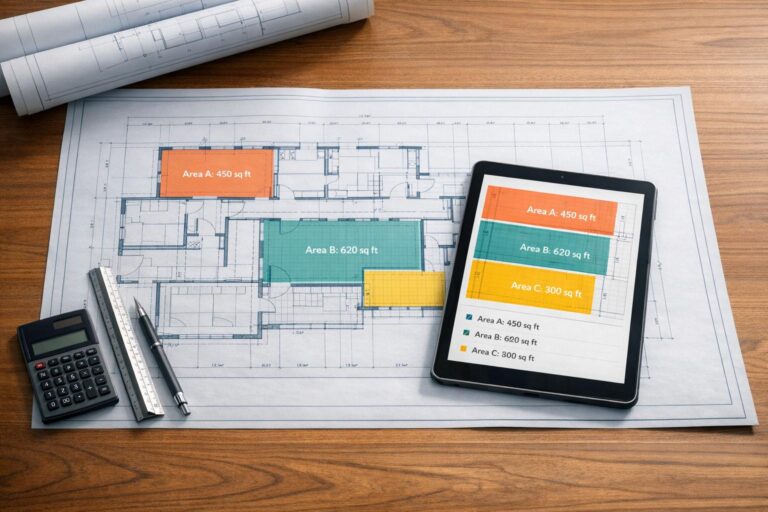
Using ScopeTakeoff to Calculate Markup
Calculating markup involves juggling numerous variables and applying precise formulas. For subcontractors handling multiple bids weekly, manual spreadsheets slow things down and introduce costly errors. ScopeTakeoff is built specifically for subcontractors working within $500,000 to $10 million in annual volume — pre-built trade libraries, automatic calculations, and proposal output that takes the guesswork out of pricing.
How ScopeTakeoff Simplifies Estimating
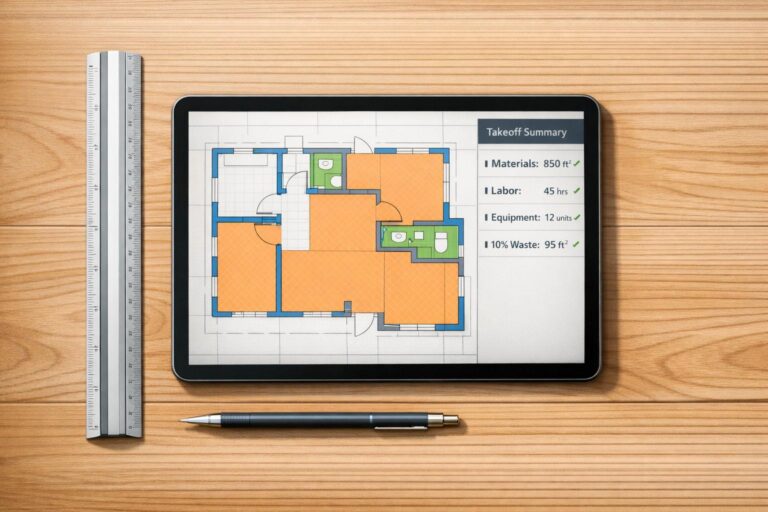
Rather than starting every estimate from scratch, ScopeTakeoff provides pre-built assembly libraries for over 10 trades — concrete, masonry, drywall, painting, HVAC, flooring, remodeling, landscape, roofing, and asphalt. Once you input quantities, the software automatically calculates labor and material costs, reducing the errors that creep in with manual Excel formulas. Integrated PDF takeoff lets you measure quantities directly from digital plans and push them into your estimate without retyping.
Trade-Specific Calculations
ScopeTakeoff handles the trade-specific math automatically — cubic yards for concrete, board counts for drywall, tonnage for asphalt, slope for roofing — without requiring you to double-check formulas or apply waste factors manually. The platform generates professional Schedule of Values (SOV) documents and branded client proposals with one click, so your calculated markups are reflected accurately in final submissions.
Pricing
At $100 per person per month with no annual contract or setup fees, ScopeTakeoff includes all trade assembly libraries, unlimited projects, PDF takeoff, and SOV export. A 14-day free trial lets you explore the platform before committing.
Summary & Tips for Accurate Bids
Markup Calculation Process
Accurately calculating markup is the difference between a profitable year and a year of unpaid labor. Add up direct costs — labor, materials, equipment, subcontractor bids. Account for overhead — rent, insurance, utilities, your own salary. Add a contingency for risk — typically 3–5% for standard projects, up to 15–25% for complex or high-risk work. Then adjust the markup to hit your target profit margin, remembering that a 20% margin requires a 25% markup.
Before finalizing, compare to historical or benchmark data to make sure the bid is both competitive and profitable.
Tips for Competitive Bids
- Use burdened labor rates, not just base wages
- Separate overhead recovery from profit
- Track estimated vs actual costs after every job
- Lead pricing conversations with value, not markup %
- Review and adjust your markup quarterly
- Confusing markup with margin
- Skipping your own salary in overhead
- Copying competitors’ prices without knowing their costs
- Applying markup only to materials, not labor and equipment
- Using stale material pricing on bids 30+ days out
Successful contractors aren’t always the cheapest. They’re the ones who price work accurately, deliver excellent results, and maintain strong profit margins to fund long-term growth. Proper markup calculation is the foundation.
Frequently asked questions
Try estimating software built for subcontractors
14-day free trial. All trade libraries included. No credit card required.
Start free trial →
Concrete · Masonry · Drywall · Painting · HVAC · Flooring · Remodeling · Landscape · Asphalt · Roofing