
How to Spot Hidden Risks in Construction Scoping

Every construction project starts with a scope, but hidden risks can quickly lead to budget overruns, delays, and disputes. Common issues include undefined trade boundaries, overlooked site conditions, and ambiguous contract language. These mistakes can inflate costs by 15–25% and cause rework that eats up 5–15% of total project budgets.
Here’s how to avoid these pitfalls:
- Thoroughly review project documents: Look for missing, overlapping, or unclear scope items. Pay attention to trade interfaces and addenda to avoid disputes.
- Conduct detailed site visits: Verify site conditions, identify potential structural or environmental problems, and use tools like laser meters for accurate measurements.
- Collaborate with your team: Use brainstorming sessions and expert input to identify risks often missed during planning.
- Leverage digital tools: Software like ScopeTakeoff can improve accuracy, reduce errors, and save time on estimates.
- Develop risk mitigation plans: Set up a clear change order process and allocate contingency funds to handle unexpected costs.
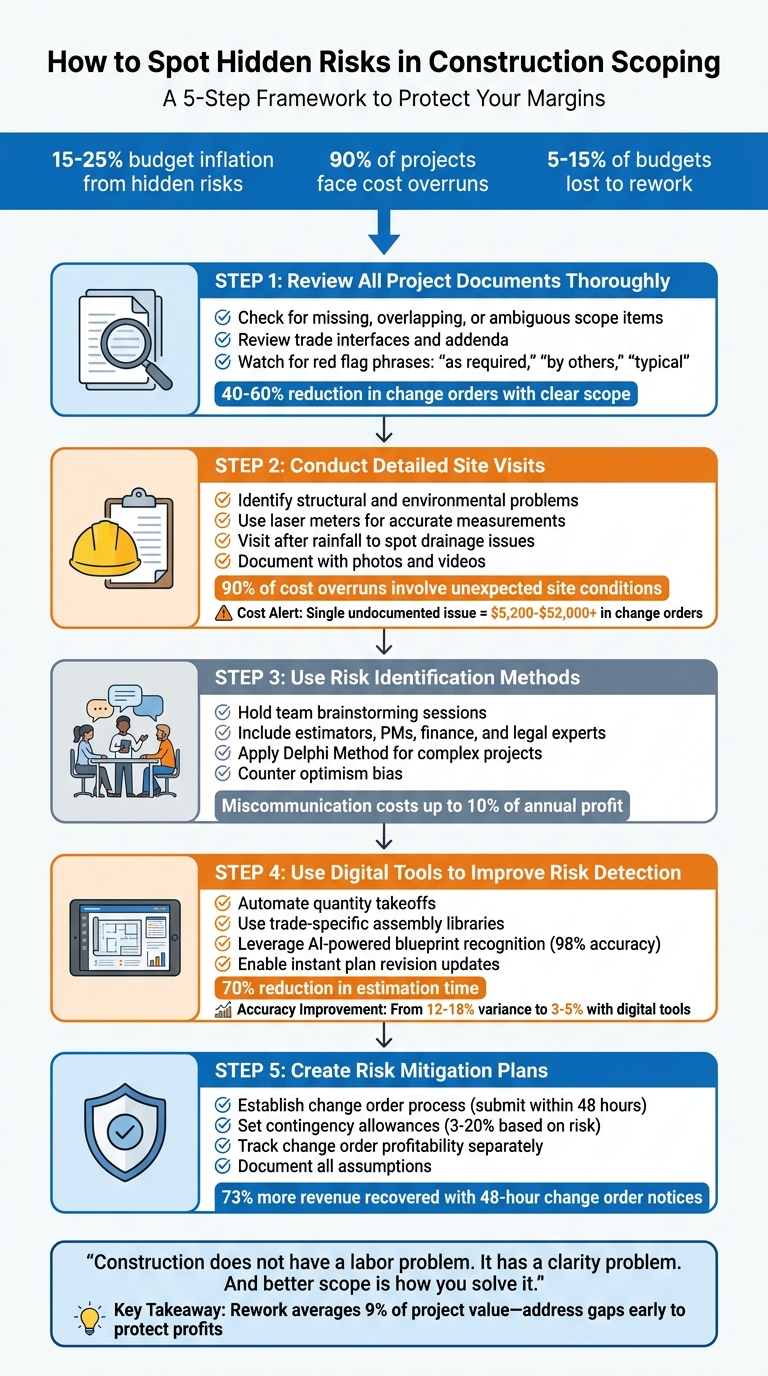
5-Step Framework to Identify and Mitigate Hidden Construction Scoping Risks
Construction Risk Management: Complete Step-by-Step Guide
sbb-itb-4ee4ad4
Step 1: Review All Project Documents Thoroughly
The first step in spotting hidden risks is to carefully review all project documents. Plans, specifications, addenda, and schedules can sometimes include conflicting details or unclear language, which can lead to costly issues once the work begins. Addressing these problems before signing the contract sets the stage for better risk management as the project progresses.
Check Plans and Specifications for Gaps
Be on the lookout for three specific types of scope failures: missing (work shown in drawings but not assigned to any trade), overlapping (tasks priced by multiple trades), and ambiguous (unclear terms that lead to disputes). Phrases like "as required", "by others", or "typical" are red flags – they often conceal undefined tasks that someone will eventually need to handle, likely at their own cost.
Pay close attention to trade interfaces, as these are common hotspots for scope issues. Take the AMP Electrical Inc. case as an example. In October 2025, the Appeals Court of Massachusetts ruled against AMP in a dispute with W.M. Schultz Construction Inc. over a $1.8 million subcontract. AMP had requested an $83,000 change order for excavation and backfilling, arguing that these tasks weren’t part of "customary" electrical work. However, the court pointed to Addendum No. 2 and Addendum No. 3, which explicitly assigned these responsibilities to the electrical subbidder. Since AMP failed to clarify the ambiguity before bidding, they were held to the terms outlined in the addenda. A well-defined scope of work can reduce change orders by 40–60%, and clear specifications can lower project disputes by 70%.
Don’t skip over addenda – they often include critical updates to scope assignments that can override earlier plans and specifications.
Review Past Project Data
Historical project data is a goldmine for understanding trade-specific estimating software to determine realistic productivity rates and identifying common challenges like site congestion, weather delays, and other practical hurdles. Compare actual labor hours to estimates, analyze change order histories, and review rework logs to pinpoint which trades or interfaces tend to cause cost overruns.
Documenting "lessons learned" from past projects is invaluable. For example, recurring issues like missed electrical connections for HVAC systems, unassigned caulking tasks, or overlooked temporary utilities often show up in multiple projects. Keeping track of these patterns helps ensure they don’t resurface in new bids. Additionally, monitoring historical price trends for materials like steel, lumber, and concrete allows you to factor realistic escalation allowances into your estimates.
Armed with this knowledge, the next step involves conducting detailed site visits to confirm the findings from your document review.
Step 2: Conduct Detailed Site Visits
Relying solely on project documents can leave you blind to hidden risks. In fact, 90% of project managers report that unexpected site conditions contributed to their last cost overrun. A single undocumented issue can lead to change orders costing anywhere between $5,200 and $52,000+. That’s why physically visiting the site is crucial to uncover problems that blueprints simply don’t reveal.
Spot Structural and Environmental Problems
When you’re on-site, focus on identifying hidden structural elements that plans might miss. For example, older buildings often have undocumented MEP (mechanical, electrical, and plumbing) routes tucked behind walls or ceilings. Use a laser distance meter to check ceiling heights – dimensions that seem fine with a tape measure can turn out to be non-standard, disrupting material orders or labor schedules. Also, confirm that utility networks like water, electricity, and telecommunications are in their expected locations and functioning properly.
Environmental hazards are another priority. Visit the site after rainfall to spot drainage issues or areas prone to pooling water that might go unnoticed in dry weather. Keep an eye out for biological hazards like mold or contaminated materials, especially in renovations involving older sewage systems. Check for chemical risks too – dust, solvents, or old paint can pose serious challenges. To get a complete picture, vary your visit times to observe how conditions change throughout the day.
These inspections lay the groundwork for more precise assessments using the right tools.
Use Measurement Tools for Accurate Assessment
Once you’ve identified potential risks, back them up with accurate measurements. Tools like tape measures and laser distance meters ensure site dimensions align with the plans. Take plenty of photos and videos, attaching them to digital checklists through mobile apps. This creates a detailed, timestamped record that can protect you in case of disputes. For renovation projects, moisture meters are invaluable for spotting hidden water damage.
"Once it’s covered, fixing it costs three to five times more than catching it in the open." – Projul
Incorporate hold points into your inspection process – specific stages where work pauses for verification. For instance, inspect plumbing lines and waterproofing seams before backfilling, or confirm MEP rough-ins before drywall installation. Always measure window and door rough openings before materials arrive; reframing is far cheaper than reordering custom pieces. These small steps can prevent costly rework, which often eats up 5% to 15% of total project costs. On a $500,000 project, that’s about $25,000 of lost profit.
Step 3: Use Risk Identification Methods
Once you’ve gathered insights from document reviews and site visits, it’s time to dig deeper. The goal here is to uncover hidden risks through team collaboration and expert input. Miscommunication and coordination problems among trades can cost contractors up to 10% of their annual profit due to errors, omissions, and rework. Using structured methods ensures that potential risks – often missed due to cognitive biases – are brought to light.
Hold Team Brainstorming Sessions and Expert Interviews
Getting input from a mix of team members – like estimators, project managers, financial managers, and legal experts – can reveal risks that one person might overlook. Each role brings a unique perspective: estimators focus on technical challenges, project managers highlight resource limitations, and finance teams flag cash flow or credit issues. This collaborative approach also helps counter optimism bias, where contractors underestimate risks because they’re eager to win a project or meet revenue goals.
"Contractors consistently underestimate risks on projects they want to pursue. This optimism bias stems from competitive pressure, revenue targets, or excitement about prestigious projects." – ConstructionBids.ai
Creating a safe environment for open discussion is key. Team members should feel comfortable voicing concerns without fear of backlash. To ensure balanced participation, you can assign a "devil’s advocate" to challenge assumptions and explore worst-case scenarios. Anonymous risk voting before discussions can also help prevent stronger personalities from dominating the conversation.
These sessions can also uncover indirect costs that might not be immediately obvious, like temporary facilities, site utilities, specialized insurance, or final cleaning requirements that aren’t clearly outlined in contracts.
For projects with a lot of unknowns, expert forecasting can add an extra layer of insight.
Apply the Delphi Method for Risk Forecasting
When dealing with projects that involve significant uncertainties, the Delphi Method is a useful tool. This technique gathers expert opinions through multiple rounds of anonymous questionnaires. A neutral facilitator manages the process, ensuring that responses stay independent and unbiased.
Here’s how it works: the facilitator sends open-ended questions to a panel of experts – such as site managers, engineers, and regulatory specialists – to identify potential risks. After each round, the responses are summarized and shared with the group. This allows experts to refine their opinions based on the collective feedback. Over time, the list of risks is narrowed down and clarified.
While the Delphi Method can take weeks to complete, it’s particularly helpful for projects with unfamiliar regulations, untested methods, or sensitive stakeholders. The time investment often pays off by providing a clearer risk picture for complex projects.
Step 4: Use Digital Tools to Improve Risk Detection
Digital tools can uncover risks that manual takeoffs and spreadsheets often overlook. With 73% of construction estimates impacted by quantity takeoff mistakes, these errors can snowball, affecting every subsequent calculation.
By automating calibration, digital tools eliminate scale misreads and spreadsheet formula errors. This sets the foundation for smoother, more reliable estimations.
How Digital Takeoff Tools Improve Accuracy
Digital takeoff software tackles risk from several angles. A single calibration against a known dimension ensures consistent, precise measurements. This accuracy helps avoid major quantity errors that could turn a profitable bid into a costly mistake.
Trade-specific assembly libraries add another layer of precision. Instead of manually counting every component, these libraries automatically include related items. For instance, a concrete assembly accounts for rebar, anchors, and forming materials, while masonry assemblies calculate blocks, mortar, ties, and reinforcement.
"I used to count every block by hand off the plans. Now I enter the dimensions and it spits out quantities, mortar, everything." – Mike C., Masonry Contractor
Color-coded markups offer a quick visual check for accuracy, and digital tools instantly update measurements when plans are revised.
AI-powered recognition takes it a step further, achieving up to 98% accuracy in blueprint area detection compared to 85–90% with manual methods. These tools can also flag line items that deviate from historical norms, catching errors before they impact your bid. On top of that, digital tools can cut project estimation time by as much as 70%, enabling you to handle more bids without sacrificing precision.
For subcontractors, platforms like ScopeTakeoff provide trade-specific calculations – such as cubic yards for concrete or tonnage for asphalt. The software even factors in waste automatically to reflect real-world conditions. At $100 per person per month, ScopeTakeoff offers an affordable way to streamline bidding for subcontractors.
Manual vs. Digital Takeoff Comparison
The table below highlights the stark differences between manual and digital takeoff methods, showing how digital tools improve both accuracy and efficiency.
| Factor | Manual Takeoffs | Digital Takeoffs (e.g., ScopeTakeoff) |
|---|---|---|
| Accuracy | Relies on estimator skill; prone to scale misreads | Software ensures consistent precision |
| Time Efficiency | 3–5 days for large projects | 5–8 hours for similar projects |
| Risk Detection | High chance of missing details or errors | Low risk; AI and assemblies catch issues |
| Plan Revisions | Requires rework or major manual adjustments | Instant updates with revised plans |
| Data Handling | Manual spreadsheet entry; error-prone formulas | Automated exports to cost databases or SOV outputs |
On average, construction estimates vary 12–18% from actual costs. However, contractors using digital tools can narrow this gap to just 3–5%. That margin can mean the difference between steady profits and costly surprises.
"One bad estimate on a $500k job wipes out months of profit." – ScopeTakeoff
The real power lies in combining technology with human expertise. While digital tools handle repetitive and error-prone tasks, you can focus on critical aspects like site conditions, subcontractor reliability, and contingency planning.
Step 5: Create Risk Mitigation Plans
Once you’ve identified potential risks, the next step is to develop strategies to handle them effectively. This is how you protect your margins and keep surprises from derailing your projects.
Two essential tools for managing risks are a change order process and contingency allowances. Together, these measures can reduce change order disputes by 40% to 60% and cut overall project disputes by 70%.
Set Up a Change Order Process
A structured change order process is crucial for protecting your revenue and maintaining project momentum. Here’s why it matters: contractors who submit change order notices within 48 hours recover 73% more revenue than those who delay. That statistic alone emphasizes the importance of acting quickly when scope changes arise.
The recommended framework includes seven steps: Identify, Notice, Document, Price, Submit, Negotiate, Execute. By following this process, you can lower dispute rates by 60% and speed up resolutions by 40%. The key is submitting written notice within 48 hours – this step is non-negotiable. Owners often use late or missing notices as their primary defense against legitimate claims.
"Written notice is the single most critical step in the change order process. Late or missing notice is the number-one defense owners use to deny otherwise legitimate change order claims." – Michael Torres, Project Management Specialist
Proceed only with signed change orders, except in genuine safety emergencies. To strengthen your case, maintain solid documentation, including date-stamped photos, daily logs, labor records, and material receipts. When pricing change orders, aim for the same margin as your original work. For smaller, disruptive tasks that require extra coordination, consider adding a 5% to 10% premium.
Here’s a quick look at pricing methods and their risks:
| Pricing Method | Best For | Contractor Risk | Owner Risk |
|---|---|---|---|
| Lump Sum | Clear, well-defined changes | High (fixed price) | Low (known cost) |
| Time & Materials | Undefined or evolving scope | Low (actual costs) | High (open-ended) |
| Unit Prices | Quantity variations | Moderate | Moderate |
| Force Account | Emergency or directed work | Low (cost-plus) | High |
Make sure to track change order profitability separately from the original contract. This will help you determine whether these changes are boosting or eroding your margins. Include all pending change orders in your monthly project reviews and escalate any unresolved items that linger for over 60 days.
Once your change order process is solid, you can turn your attention to managing unforeseen costs with contingency allowances.
Add Contingency Allowances
Contingency allowances are your safety net for unexpected costs. But it’s important to understand the difference between allowances and contingencies. Allowances are for specific but undefined items, like finish selections, while contingencies are funds reserved for truly unexpected issues, such as weather delays or hidden site conditions. Keeping these separate ensures you don’t deplete your contingency funds on items that should have been accounted for elsewhere.
The percentage of contingency funds depends on the project type. For example, general construction projects typically require 3% to 5%, concrete estimating software users often see higher variances in foundation work, renovations might need 5% to 10%, and projects involving hazardous materials could demand 10% to 20%. However, these are just starting points – your actual percentage should reflect the project’s risk level and how complete the design is.
| Risk Level | Design Complete | Design 50% | Design Concept |
|---|---|---|---|
| Low Risk | 0–2% | 3–5% | 8–10% |
| Medium Risk | 2–4% | 5–8% | 10–15% |
| High Risk | 4–6% | 8–12% | 15–20% |
Decide whether to use explicit contingencies (visible as a line item) or bury them in unit prices, depending on how much transparency you want with your client.
To control how contingency funds are used, set strict approval processes. For example, field supervisors might approve smaller amounts (under $5,000), while project executives handle larger allocations. Every request to dip into contingency funds should be tied to a specific event, such as weather-related delays, concealed conditions, or code changes.
Use data from past projects to refine your contingency estimates. Look at RFI rates and cost variances by trade to base your percentages on real-world performance rather than guesswork. At the end of the project, document the reasons for every contingency draw to improve future estimates.
How ScopeTakeoff Reduces Scoping Risks
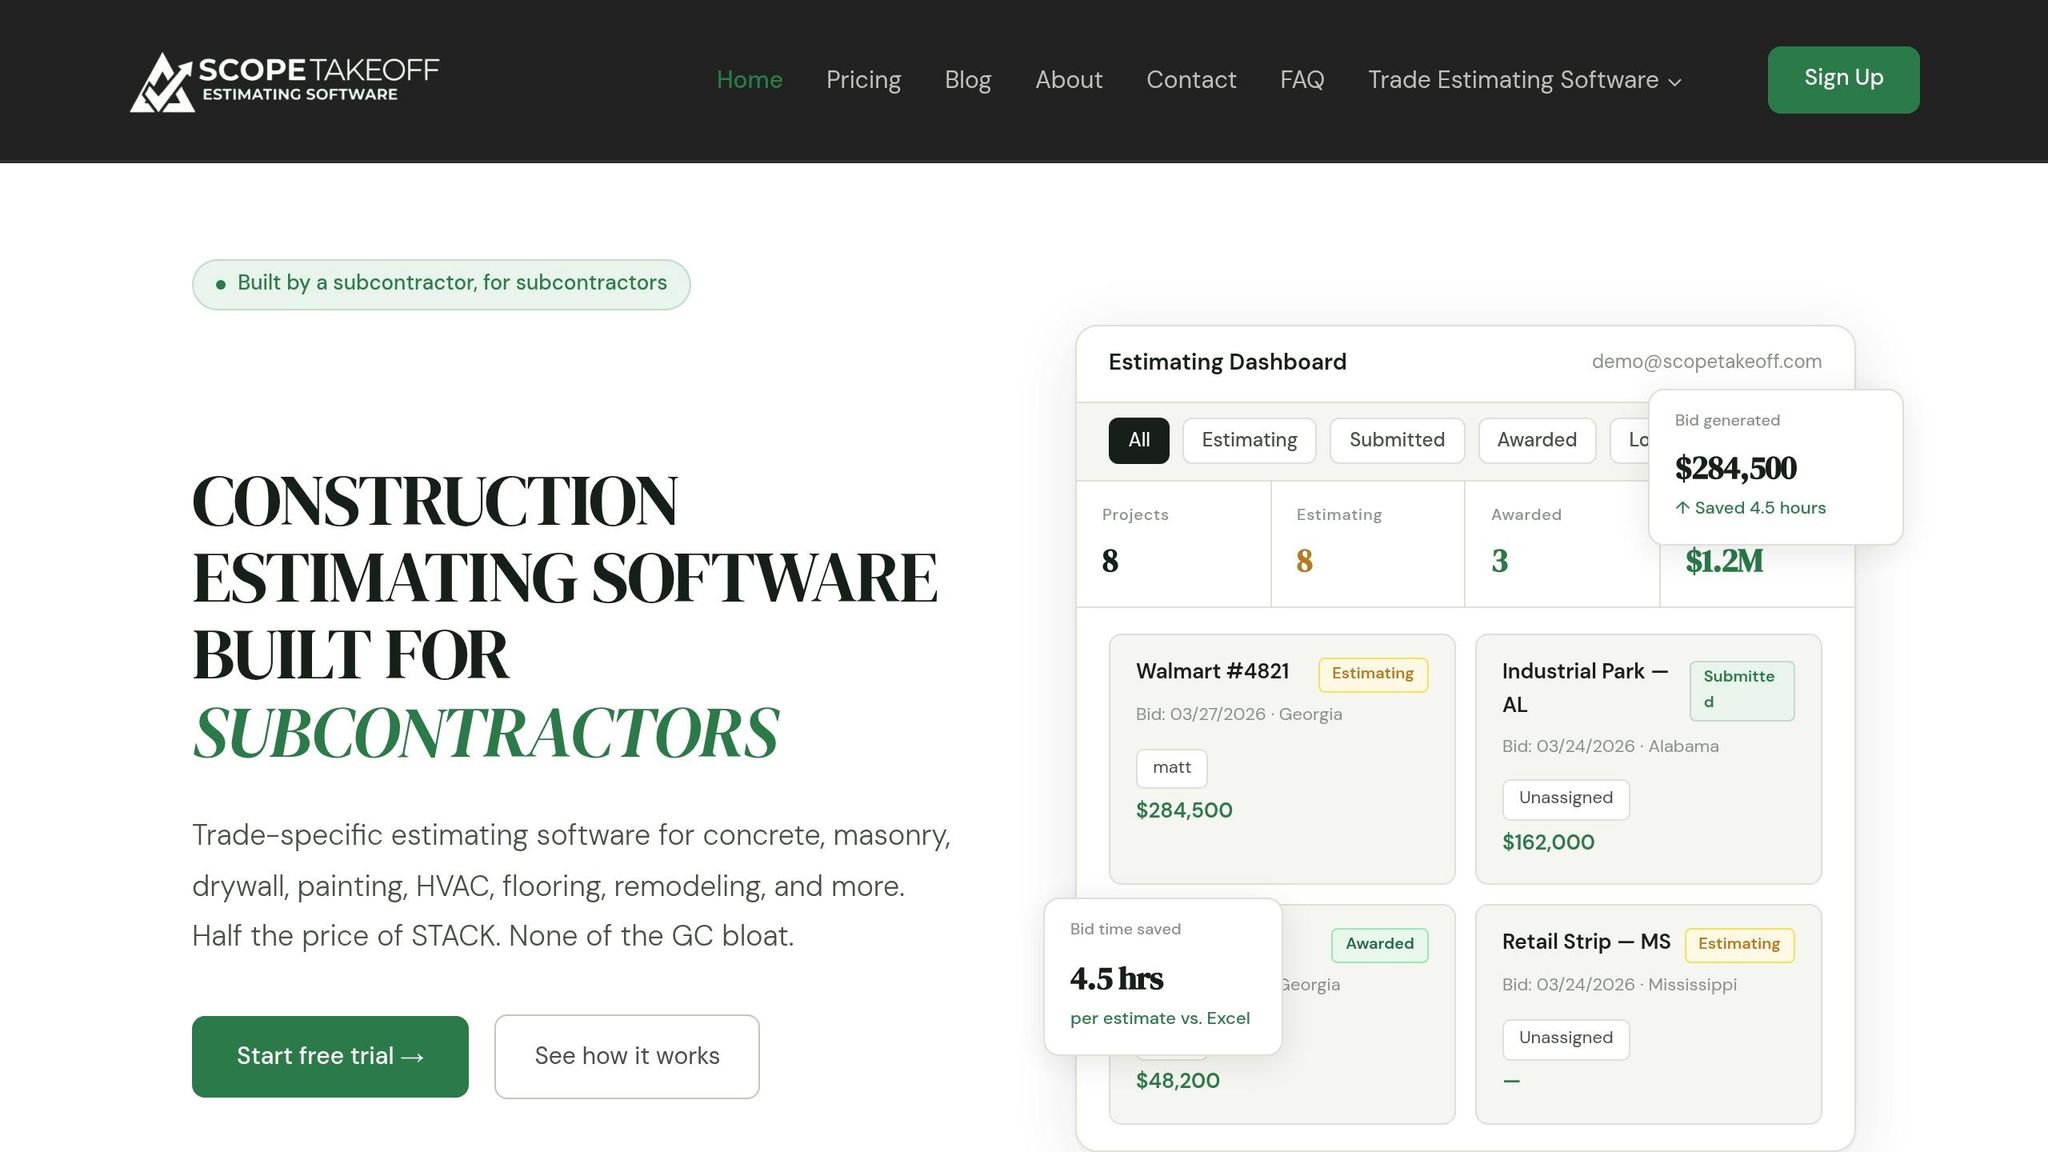
ScopeTakeoff is built to help subcontractors spot and address hidden risks before contracts are finalized. By combining advanced software tools with solid risk management practices, it complements essential tasks like detailed document reviews and on-site inspections.
One standout feature is its trade-specific assembly libraries, which cover over 10 trades, including concrete, masonry, HVAC, drywall, roofing, and more. These libraries simplify the estimating process by allowing users to input quantities just once. From there, the software automatically calculates labor and material costs. For example, if you enter wall dimensions, the masonry library generates a complete material list – no need to manually count blocks, calculate mortar, or estimate grout. This automation eliminates common errors that could eat into profits on large projects, like a $500,000 job.
"The masonry assembly library alone is worth it. I used to count every block by hand off the plans. Now I enter the dimensions and it spits out quantities, mortar, everything." – Mike C., Masonry Contractor
The software also handles complex calculations for tasks like determining concrete cubic yardage, drywall board counts, and asphalt tonnage. Its integrated PDF takeoff tool directly measures quantities from digital blueprints, reducing the chance of mistakes caused by manual retyping. These tools fit seamlessly into existing quality control workflows, ensuring project measurements match the actual scope.
Another key feature is the bid review workflow, which acts as a final quality checkpoint. Team leaders can review each estimate for scope gaps or quantity errors before submission. This streamlined process allows subcontractors to generate three times as many bids per week. Plus, with a one-click Schedule of Values export feature, estimates can be sent directly to general contractors. At just $100 per user per month and no annual commitment, ScopeTakeoff saves an average of 4.5 hours per estimate compared to traditional spreadsheet methods. Together, these tools strengthen the overall approach to reducing scoping risks.
Conclusion
Hidden scoping risks often emerge during the bidding phase when project details are unclear, trade responsibilities are left ambiguous, or assumptions go undocumented. These gaps in clarity can lead to significant financial consequences – 90% of projects face cost overruns, with poorly defined scopes inflating budgets by 15–25%. Such challenges, however, can be addressed with a structured approach to scoping.
The five-step framework discussed here – thorough document review, detailed site visits, structured risk identification, leveraging digital tools, and formal mitigation plans – provides subcontractors with a clear roadmap to safeguard their profits. This process not only helps avoid costly mistakes but also ensures profit margins are maintained.
"Construction does not have a labor problem. It has a clarity problem. And better scope is how you solve it." – Provision
By combining meticulous preparation with ScopeTakeoff’s digital tools, subcontractors can significantly reduce guesswork and cut costs. This approach enhances clarity around roles and responsibilities, especially at trade boundaries – the most common point of scope failures. Clearly defining who handles tasks at these intersections prevents redundant work that can erode profits.
Additionally, documenting every assumption during bidding, linking notes to drawings, and including escalation clauses to manage material price fluctuations can further protect budgets. This is particularly critical given that construction material prices have risen nearly 40% above pre-pandemic levels, with 80% of materials experiencing increases since 2020.
Rework costs, including delays and indirect impacts, average about 9% of a project’s value. Addressing gaps early can significantly reduce these expenses. Digital tools that cut scope administration time by 75% and deliver 94% accuracy are not just helpful – they are essential competitive advantages that keep projects on schedule and within budget.
FAQs
What scope gaps should I flag before bidding?
It’s crucial to identify and address scope gaps where responsibilities, inclusions, or exclusions are unclear – especially when multiple trades are involved. Ambiguous notes like "TBD" or unverified assumptions about what work is included can spell trouble. These gaps often result in overlooked labor, unaccounted materials, or scope creep, all of which can lead to costly rework or unexpected change orders.
By spotting and clarifying these issues early in the process, you can protect your project from margin erosion and avoid unnecessary delays. Being proactive here saves time, money, and frustration down the line.
What should I document during a site walk to avoid claims?
When conducting a site walk, keeping detailed documentation is key to avoiding disputes. Here’s what you should focus on:
- Take detailed notes: Record site conditions, any discrepancies, and observations in writing. Be as specific as possible to avoid misunderstandings later.
- Capture photographs: Snap clear images of any unexpected issues or conditions that could impact the project.
- Log scope changes: Document any modifications or clarifications to the project scope that come up during discussions.
By maintaining thorough records, you create a clear and accurate account of the site walk. This not only helps in preventing disagreements but also provides solid support should claims arise.
How much contingency should I carry for a renovation?
When planning a renovation, setting aside a contingency fund is key. Experts often recommend allocating 10% to 20% of the total project cost. If your project involves significant unknowns or structural challenges, leaning toward the 20% range can help cover surprises like hidden damage or unexpected material costs. For simpler projects, sticking closer to 10% might suffice. Always evaluate the specific risks of your project to decide on the right amount.