
General
Low Bid Win Rate? 5 Ways to Improve Estimate Accuracy
If you’re losing bids or watching profit margins erode, the root cause is usually estimate accuracy — not pricing strategy. The most reliable ways to tighten estimates: (1) use estimating software with assemblies, (2) do takeoffs digitally instead of by hand, (3) track actual job costs and feed them back into bids, (4) standardize templates for the work you do most, and (5) run a structured pre-submission review. The cheapest bidder doesn’t win — the most accurate one does.
Construction estimates routinely miss actual costs by double-digit percentages. On a $5M bid, a 3% error is $150,000 — enough to wipe out the year’s profit on that job. And on competitive public work where the spread between first and second place is often 2–3%, a tighter estimate is what wins.
Here are five practical ways to cut variance, catch errors before submission, and submit bids that actually win profitable work.
1. Use Estimating Software with Trade-Specific Assemblies
Replace manual math with assemblies
Most estimate errors come from the same place: a manual calculation or transcription that nobody caught. Modern estimating software cuts that risk by automating measurements, assemblies, and pricing updates. Once an assembly is built — say, a wall assembly that includes studs, drywall, fasteners, mud, tape, and labor — measuring the wall once produces every line item underneath it.
How it improves accuracy
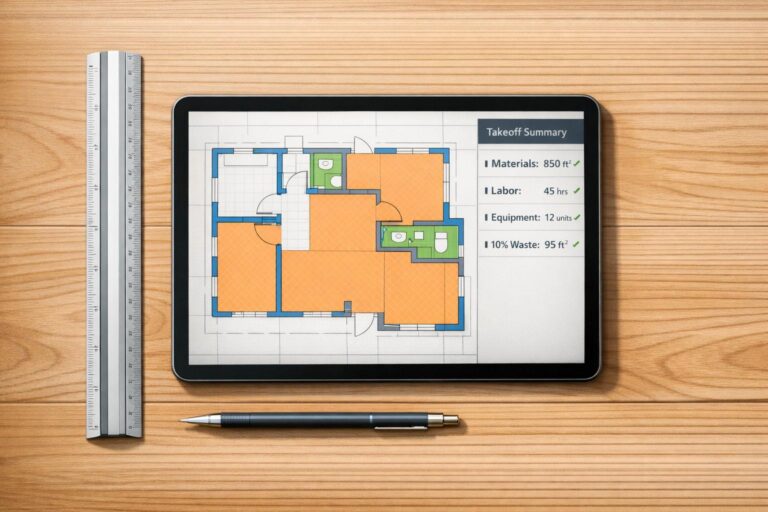
Digital takeoff tools pull measurements directly from PDF plans. Cross-reference quantities against square-foot benchmarks and the outliers jump out before they get baked into the bid. Instead of an estimate that varies by 12–18% from actual cost (industry average), a structured digital workflow can pull that down to a 3–5% range.
The math is simple: catching a 3% error on a $5M bid saves $150,000. The time it takes to set up a clean review process pays for itself in a single bid.
How it speeds up workflow
Beyond accuracy, digital tools cut takeoff time substantially. Instead of tracing walls, doors, and outlets by hand across 20+ pages, you measure once and the software fills in the rest. Cloud-based platforms keep drawings, scope notes, and historical data in one place — so cost updates flow into every active bid automatically.
Pricing reality
Professional estimating tools typically run $100–$500 per month per user. ScopeTakeoff sits at $100/person/month and includes 10+ trade assembly libraries, unlimited projects, PDF takeoff, and proposal exports — with no annual contract. The savings from avoiding even one significant estimate error make it pay for itself fast.
2. Move Takeoffs from Manual to Digital
Stop measuring with a scale ruler
Quantity takeoff errors are the single biggest source of estimate variance. A 10% takeoff error on a $500,000 project is a $50,000 swing — and that’s before pricing even gets applied. Manual takeoffs using printed plans and scale rulers compound small mistakes at every step. Digital takeoff tools eliminate the scale-reading errors entirely and calculate areas, lengths, volumes, and counts directly from the PDF.
Where the accuracy gain comes from
Three places: scale calibration, automated math, and assembly logic. Once you calibrate a digital plan to a known dimension (a 3-foot door, a labeled wall length), every measurement on that sheet is accurate. The software does the area and volume math without rounding errors. And when assemblies are tied to your measurements, you stop missing the small line items — the screws, the adhesive, the joint compound — that quietly eat margin.
Time savings
A mid-size commercial takeoff that used to take 1–2 days runs 2–4 hours digitally. Repetitive layouts (apartment buildings, hotels, retail strips) take advantage of copy-and-replicate features — measure one unit, replicate across all similar units. And revisions stop being a nightmare: overlay tools highlight what changed between drawing versions in a different color, so you update only what moved instead of starting over.
Integration into existing workflow
Most projects already arrive as PDFs, so adoption is straightforward. Most estimators are productive in 2–4 weeks. Once takeoff data flows into the estimate sheet automatically, the final bid price updates as quantities update — no double entry, no missed sync.
3. Use Historical Cost Data for Better Pricing
Your past projects are the best cost guide you’ll ever have
Track estimated vs. actual costs on every project for a year and your future estimates get measurably more accurate. Published cost guides like RSMeans are useful starting points, but nothing matches data that reflects your crews, your markets, your management, and your actual cost structure.
How to start
You don’t need fancy software. A spreadsheet works. Record estimated vs actual costs by CSI division for your last 10 completed projects. Calculate the variance. Look for patterns:
- Are you consistently underestimating one trade by a similar percentage?
- Does concrete always run 5–8% over your estimate?
- Is electrical 12% high every time?
When you spot a pattern, you have a correction factor. If your concrete consistently runs 7% over, apply a 1.07 multiplier on your next concrete estimate. Same logic for waste factors — instead of guessing 5–15%, use what your jobs actually consumed.
The compounding benefit
Historical data also shows you which subcontractors quote accurately. Track the gap between a sub’s initial quote and their final invoice — over time you’ll know which subs to weigh higher and which to verify carefully. The same logic applies to material suppliers and equipment rates.
Time savings
With historical data centralized, preliminary estimates get fast. Square-foot cost benchmarks specific to your project type, size, and region let you sanity-check a new bid in minutes. If a new estimate is significantly off your historical average, you investigate before submitting — not after losing the job (or winning it at a loss).
Update your adjustment factors quarterly with new project data and your bids stay aligned with current market reality, not year-old assumptions.
4. Build Standardized Templates and Assemblies
Stop starting from a blank sheet
Estimates built from scratch every time miss line items. Standardized templates for the work you do most kill that problem. The pattern: build a “master template” for each core service — bathroom remodel, recessed lighting installation, slab pour, etc. — that lists every possible line item. For a new bid, duplicate the template and remove the items that don’t apply rather than starting at zero.
Built-in checklist effect
Templates are checklists. Debris removal, permit fees, insurance, admin time, dump fees, mobilization — these are the items that disappear from scratch-built estimates and quietly become unbilled overhead. A good template makes them explicit. You can still remove them if they don’t apply, but they get evaluated, not forgotten.
Assemblies push this further by bundling related items. An electrical assembly for a recessed light might include the fixture, the wiring, the can, labor hours, and any controls. Measure once, and every component is captured.
Time savings
Templates let you quote common jobs in under a minute. Setting up the initial template takes a few hours, but every estimate after that gets faster. Templates also make tiered pricing easy — duplicate the master, adjust scope, and present the client with good/better/best options. That alone tends to lift average job value.
Maintenance
Update unit costs monthly for volatile materials (lumber, copper, concrete). Quarterly, review which templates get used most and which generate the best margins — then refine the underused ones or retire them. Templates also double as training tools: a new estimator working from your master templates picks up your pricing and scope standards faster than they would from scratch.
5. Add a Structured Bid Review Workflow
Three-tier review catches what the estimator misses
Even with great software and great templates, a final review is what separates winning bids from costly ones. A single estimator catches some errors. Three sets of eyes catch most.
The three tiers
Self-review (30–60 minutes)
The estimator runs through a standardized checklist — math, missing scope, unit mismatches, broken cell references, applied markup, exclusions documented.
Peer review (2–4 hours)
A second estimator reviews the five highest-value line items and challenges pricing assumptions on anything over $50K. Spend 80% of the review time on the 20% of line items that drive the bulk of cost.
Management review (1–2 hours)
Senior leadership signs off on strategic alignment — risk allocation, contingency adequacy, whether this is a job you actually want to win at this number.
The trade-off
A full review adds 4–7 hours to your pre-bid process. That feels like a lot until you realize it pays for itself the first time it catches a missed line item, a quantity error, or a markup mistake. The math on a $5M bid: 5 hours of review time vs $150,000 saved on a 3% error correction. That’s the trade-off you’re making.
A clean bid review workflow inside your estimating software keeps everyone on the same page. Comment threads on specific line items, version history, sign-off tracking — none of which exists when you’re emailing spreadsheet attachments back and forth.
Post-job feedback loop
After every job wraps, do a short estimated-vs-actual review on the major line items. Patterns emerge fast — and they feed back into your templates, your historical data, and your future bids. This is the loop that separates estimators who stay flat from the ones whose accuracy compounds year over year.
The Bottom Line
The cheapest bidder doesn’t win — the most accurate one does. Each of these five strategies tackles a different weak point in traditional estimating: software automates the math, digital takeoff kills scale errors, historical data corrects optimism bias, templates ensure nothing gets forgotten, and structured review catches whatever slips through.
- Run takeoffs digitally, not by hand
- Build a master template for every recurring job type
- Track estimated vs actual costs on every project
- Use a three-tier review for any bid over $250K
- Update unit costs monthly, adjustment factors quarterly
- Manual scale-ruler takeoffs on PDF plans
- Starting estimates from a blank Excel sheet
- Using year-old material prices
- Submitting bids without peer review
- Skipping the post-job actual-vs-estimate review
Start with whichever strategy fits your biggest pain point. If your takeoffs eat the most time, fix that first. If your estimates consistently miss on certain trades, your historical data is the lever. The goal is a repeatable, data-driven process that protects margins on every bid you submit.
Frequently asked questions
Try estimating software built for subcontractors
14-day free trial. All trade libraries included. No credit card required.
Start free trial →
Concrete · Masonry · Drywall · Painting · HVAC · Flooring · Remodeling · Landscape · Asphalt · Roofing